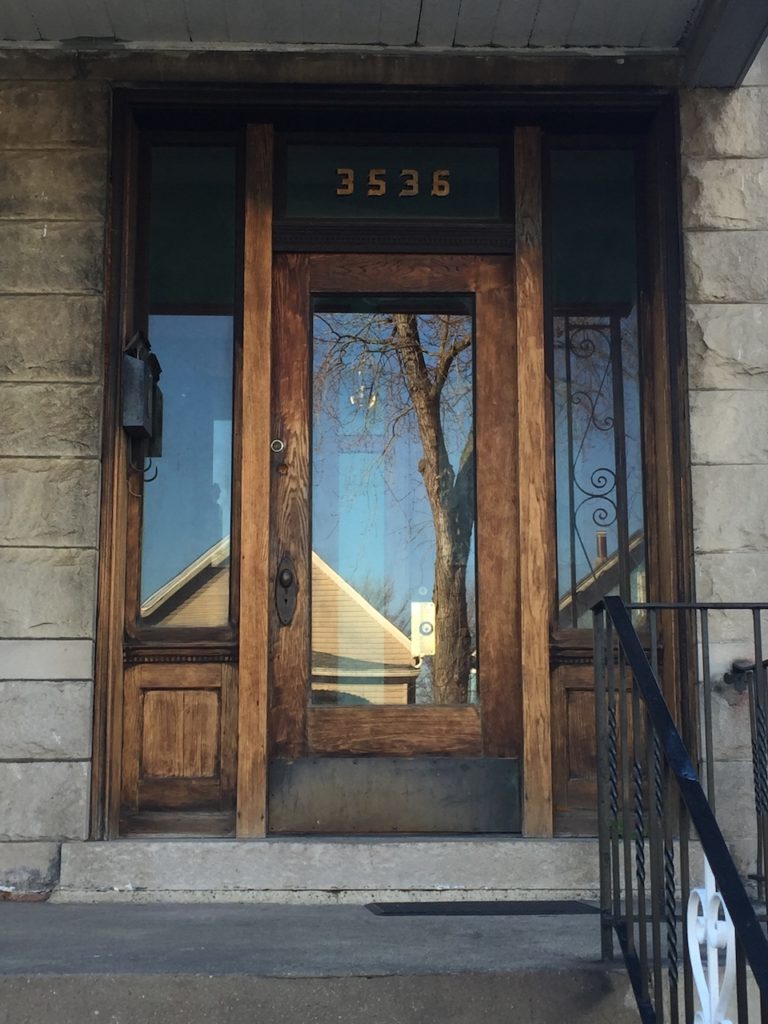
Since we moved to our greystone, the front doors have been the feature of my house that have been both among the most embarrassing and the most I have wanted to just avoid. Not only did I not replace them or paint them for three years, but I didn’t even bother to peel off the pieces of tape left on them from the previous owners’ holiday decorations. I’m not quite sure why I did that, but I suspect it’s mainly because there were so many more pressing projects right in front of me, you know, like finding and replacing a missing tile in our shower so my husband and I could actually stand while showering. The doors were in horrible shape, dented up, filthy, and with two different dingy door knobs. Despite being a few decades old and cheap to begin with, they were topped with the original transom window and flanked by the original wood doorframe, which all has multiple layers of paint on it, of course. And this leads to what was probably the second reason I ignored the door project for so long: in my mind, the real solution to the door problem was to replace them with salvaged doors in the period and style of the original or, barring that, have a new reproduction door made. Based on the size of the opening, and the front door on the greystone across the street, I suspect that the original door on our house was wood with a ¾ lite and two lites on the side (if you don’t know, lite means window). Like this one:
We recently had the wood refinished in one of our bedrooms, and while the contractor was out doing the quote on the work to be done, I asked for a quote on the front door. To strip the frame, replace the door with a salvaged one, and stain and finish it all to match, it’d be about $4,000. While I wouldn’t be opposed to eventually spending the money for my dream door that would return our greystone’s facade to its original glory, that’s just not what I want to spend 4k on at this particular moment in my life. I also researched what it would cost to buy a new door or doors. Here’s what I learned in a nutshell: doors are expensive, all doors, even cheap doors. To replace our doors with basically the same ones we already have – the cheapest double doors at your local big box home improvement store – would be about $1,000. That just felt like a disappointing use of $1,000. In my mind, my best option was to fix up and paint my existing doors.
One day I was feeling brave and went out to see just how bad of condition the doors were in. When I unscrewed the kick plates, here’s what I found:
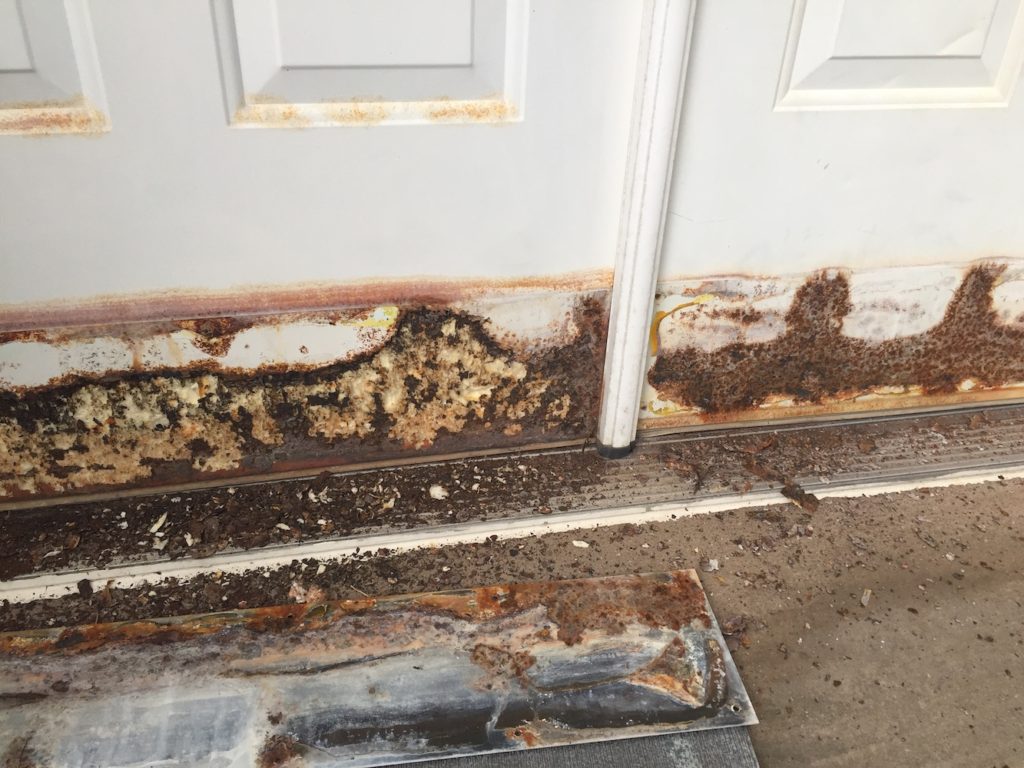
Fortunately my supportive husband who is much more laid back than I am helped me with this step, because he immediately knew to reassure me that it was no big deal and that I was definitely capable of tackling this project. I did some research on how to fix rusted doors, and essentially here’s what you need to do: 1) Remove as much rust as you can; 2) Sand down the rust that you can’t actually break off; 3) Use All-Purpose Bondo to fill in the holes; 4) Sand; 5) Repeat steps 3 and 4 just like you would spackle your wall. Getting all of the rust off was challenging because there was so much of it, but for better or worse, the core of the doors is actually a foam. Although the thought that I was spending so much time and effort to fix such cheap doors made me feel a little silly, it was probably a good thing that they are not solid metal because it meant the rust had to stop somewhere. Because there are two doors that of course have two sides each, this took days, but here’s what they looked like when I was done:
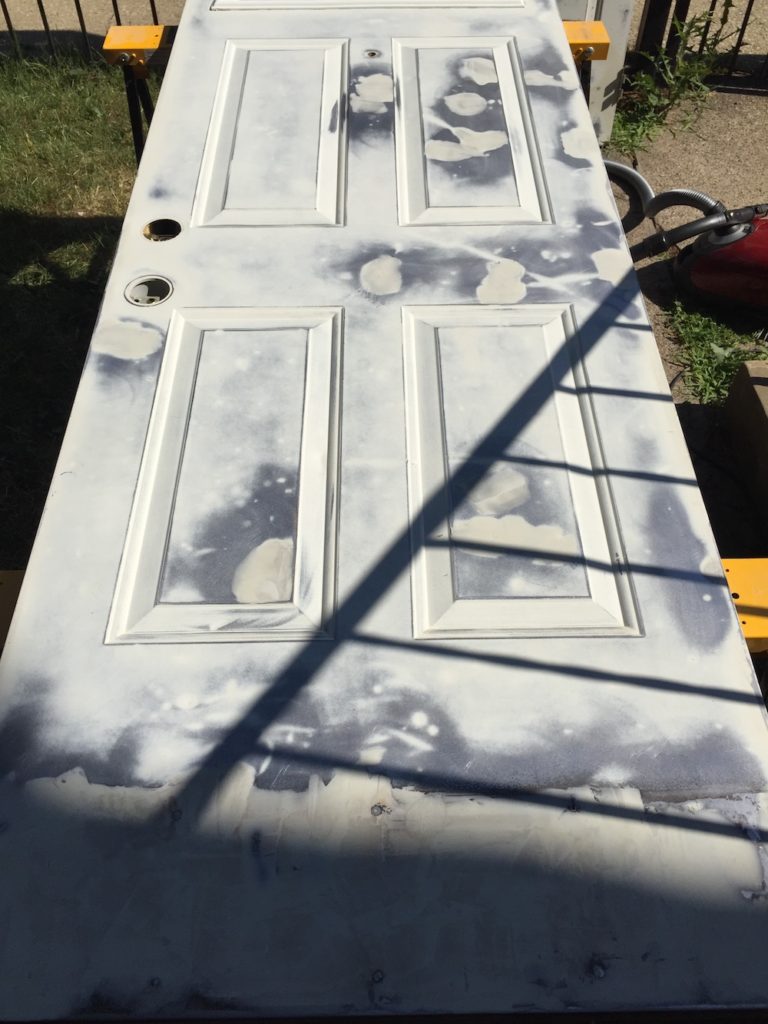
Now I was ready to prime. I chose an oil-based rust inhibiting primer. The can said it worked with either oil-based or latex paint top coat. I was nervous about this since the general rule is to use oil-based primer with oil-based paint, and latex with latex, but after reading most of the labels of the primers at Ace, I decide that this primer was my best option and I’d give it a whirl even though I’d already chosen a latex paint for the top coat. As a heads up for working with oil-based paint, it smells really strong and it’s super difficult to clean off of everything, especially your hands.
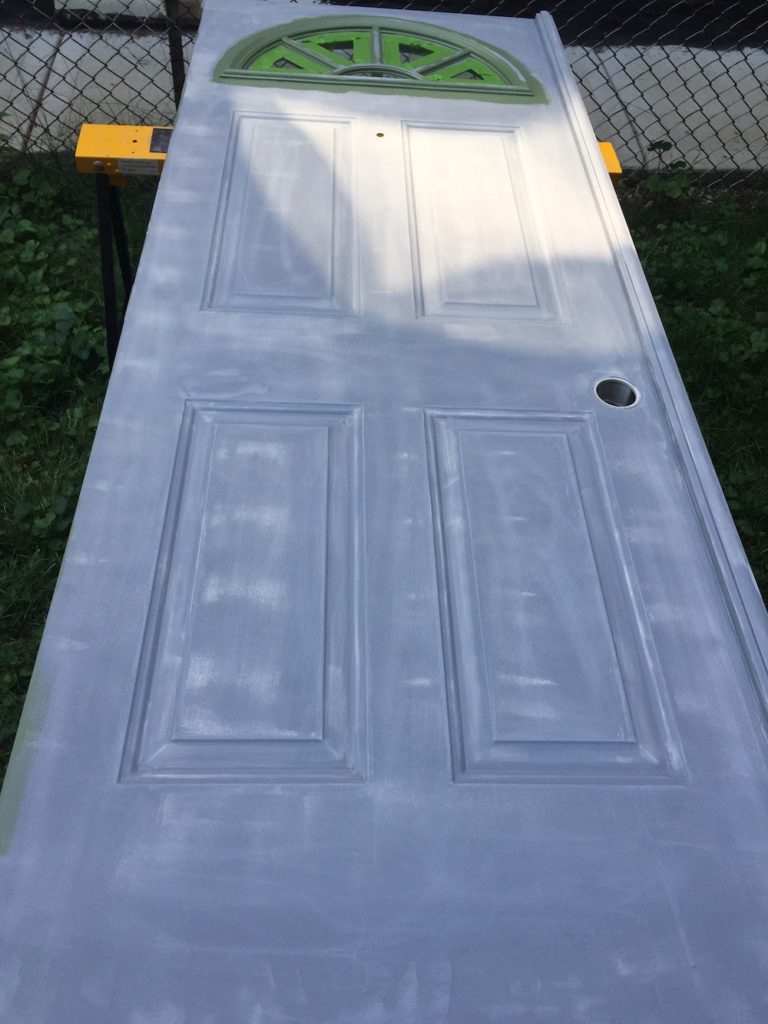
I was finally ready to paint the doors. There are many tutorials online for how to do it the right way. Based on my research, I decided to use a small brush to paint the sticking (the indented frame around the panels), and to use a small foam roller to paint the rest of the doors.
I decided not to paint the frame around the door, but to give it a good washing. Basically, I know that we’ll be stripping the paint off of the frame eventually, and I don’t want to add another layer of paint. This is maybe a mistake and a little lazy, but this project had to end somewhere. I also decided to clean up the kick plates rather than replace or paint them. I considered replacing them, but felt it would be wasteful to get something new that I knew wouldn’t be permanent anyway. They don’t look great, but they are a major improvement and I can live with them for now.
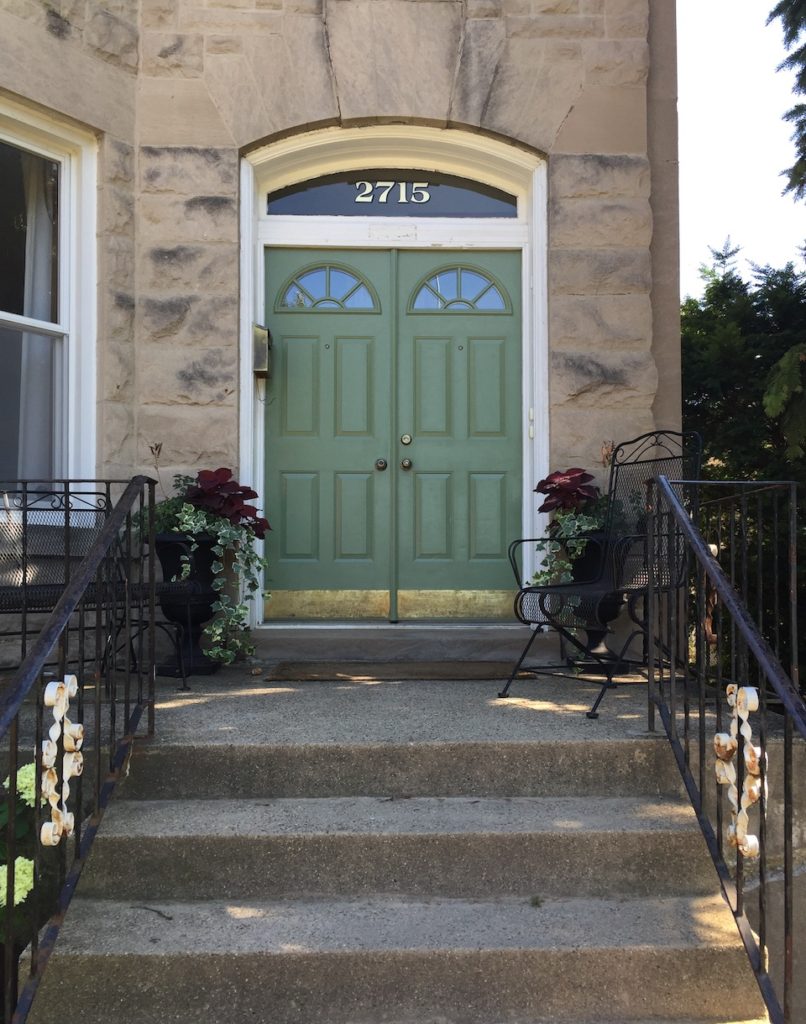
I added some other aesthetic touches to increase the overall curb appeal by installing transom numbers (future post about that soon) and flanking the doors with some urn planters in the style of the house. Here was the final product:
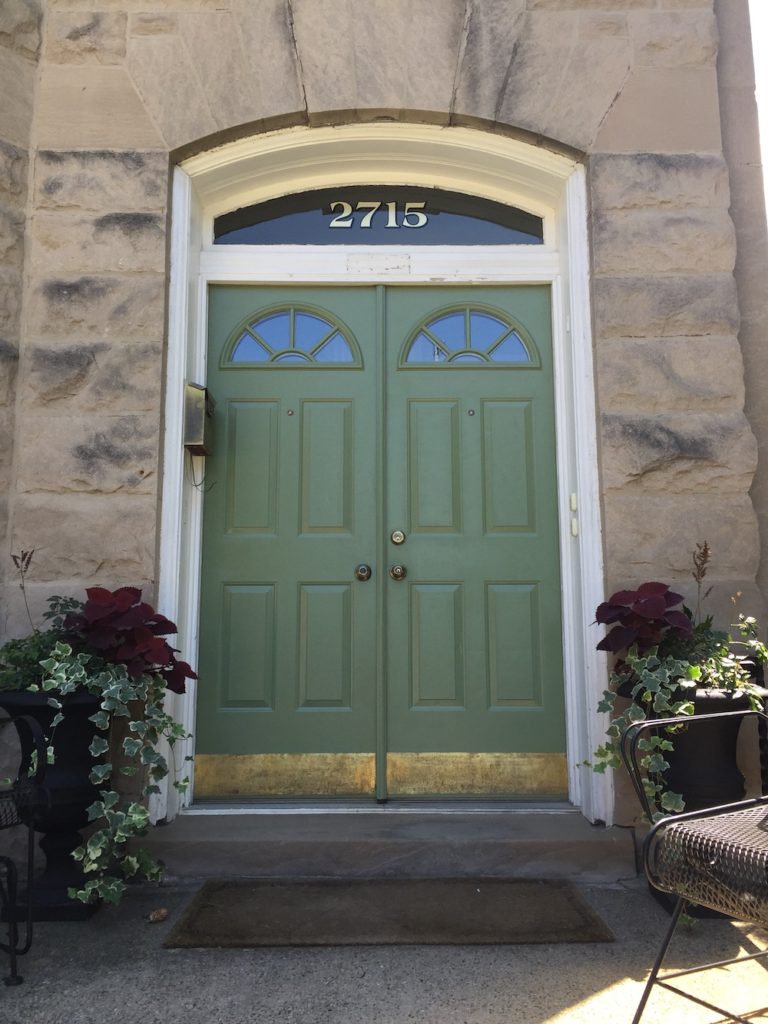
Because I have two doors and they were in such rough shape, this was certainly no weekend project, as painting front doors is often described. This probably took me about ten days, though some days were simply applying a coat of paint in the morning and then letting it dry for the rest of the day. Despite this taking a good two weeks out of my summer, to me it was totally worth it. I know this solution is temporary, since I’m sure the Bondo won’t hold forever and they’ll start to look dingy again, but I’ll be happy if I can get another five years out of these doors.
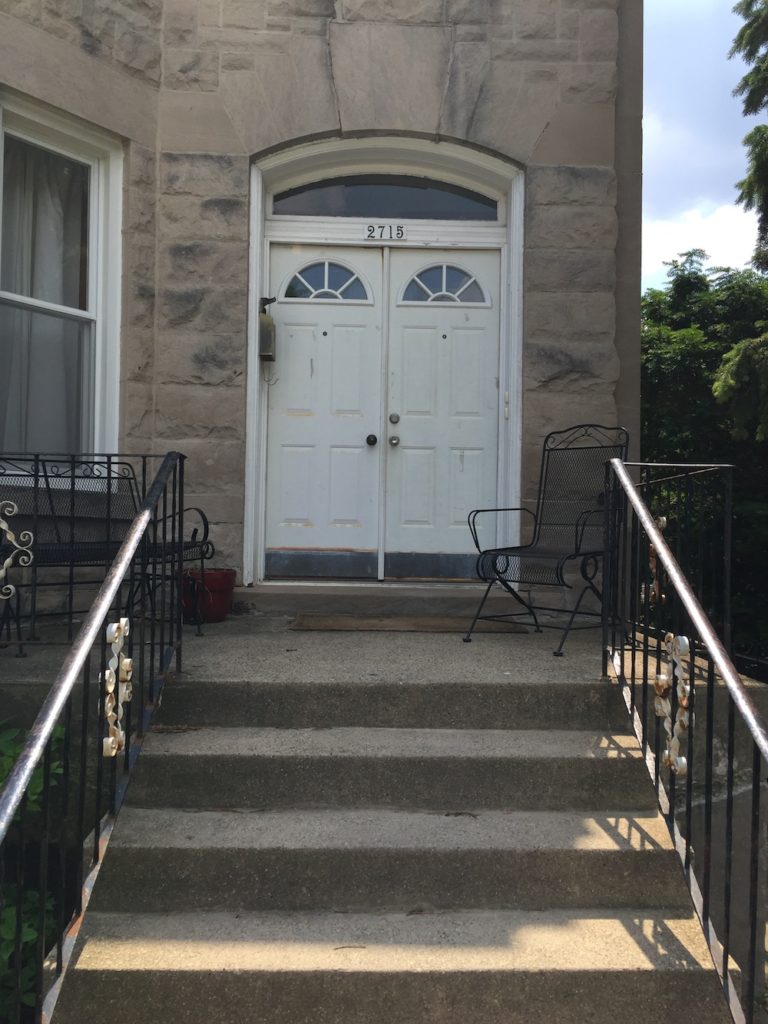
Before 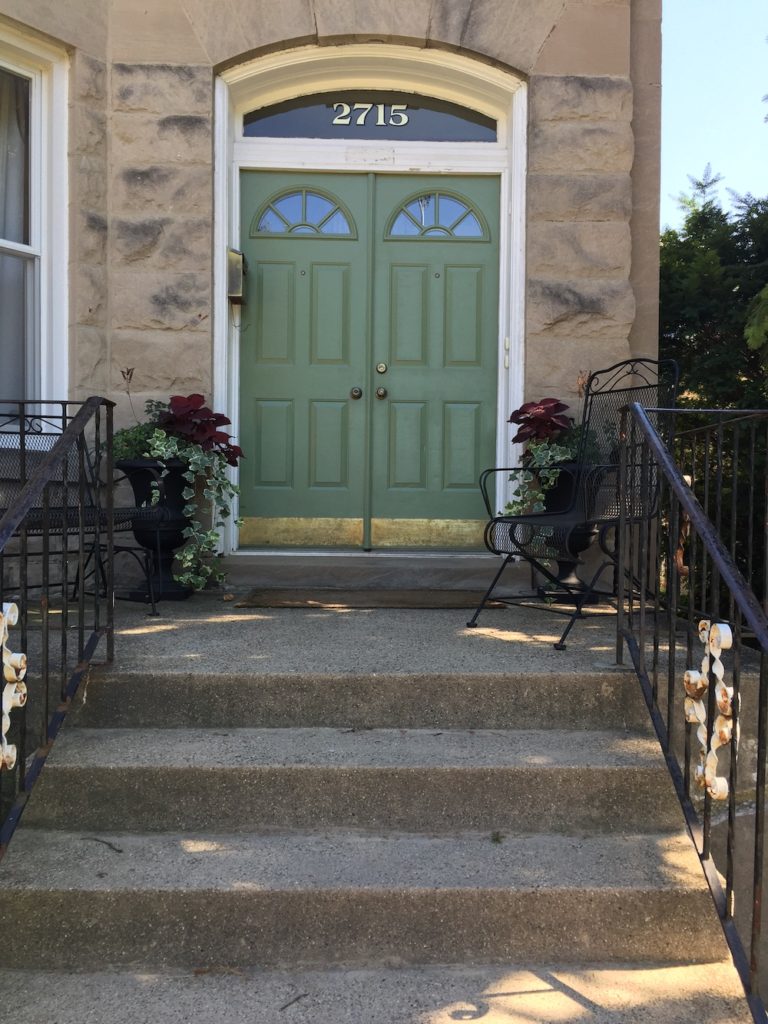
After